MRCOOL DIY 5th Gen 120V 15 Amp Plug Installation with a Pre-Charged Quick Connect Line Set
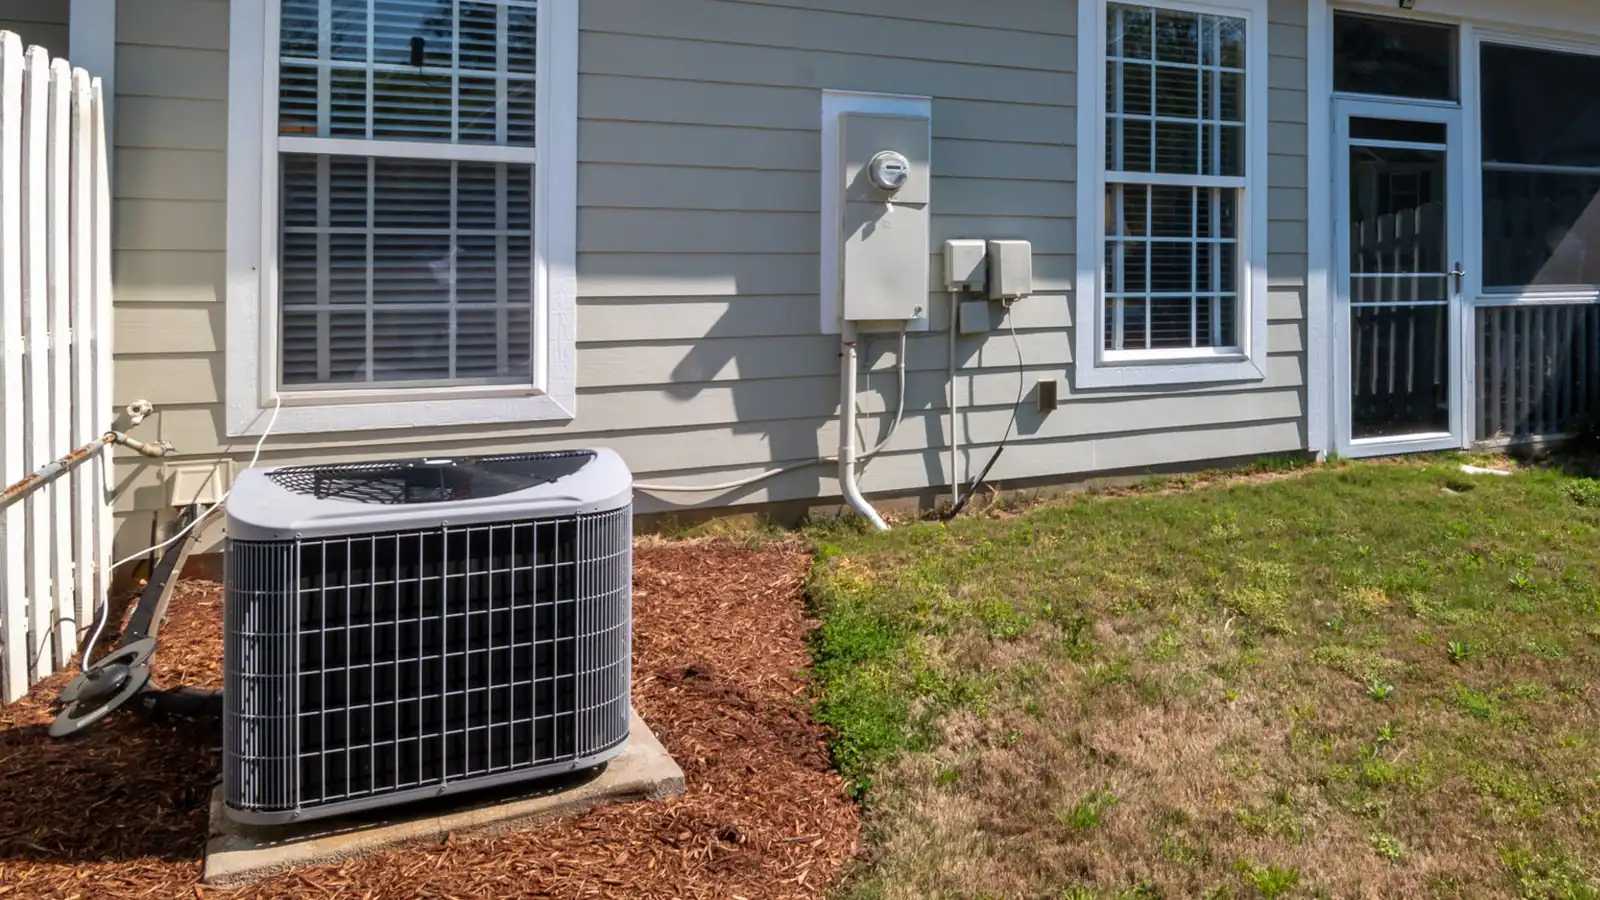
Fast Answer: Can You Plug a MRCOOL DIY 5th Gen into a 120V 15 Amp Outlet?
No. MRCOOL DIY 5th Gen 115/120V systems are designed to be hard-wired to a dedicated circuit with an outdoor disconnect, not plugged into a standard NEMA 5-15 receptacle. MRCOOL's own electrical guide specifies a 20 amp breaker with 12-2 minimum wire for both the 9K and 12K 115V units, and the 12K condenser's nameplate lists an MCA of 18 amps against an MOCP of 20 amps. A 15 amp receptacle circuit is undersized for it.
If a genuine plug-in install is the requirement, the brand engineered around it is Zone Air: its 115V systems run on a dedicated 15 amp single-pole circuit, and it sells an optional NEMA 5-15P cord kit that turns the outdoor connection into a plug. That is still a dedicated 15 amp GFCI outlet with a weatherproof in-use cover, where local code allows it — not an existing garage receptacle with a freezer already on it.
The rest of this guide covers what the 120V numbers actually require, why a dedicated circuit and correct breaker sizing matter, and how the pre-charged quick connect line set lets a homeowner do the entire refrigerant side without a vacuum pump, a flaring kit, or an EPA Section 608 certification.
The split is worth stating plainly: installing a MRCOOL DIY system requires no HVAC certification, but the electrical portion is a different story. All electrical work must follow the National Electrical Code edition your jurisdiction has adopted, plus any local amendments, and may require a licensed electrician even though the refrigerant side is fully DIY.
Already have one installed and it is showing a code? Look it up: MRCOOL error codes, Zone Air error codes, or the full mini split error code lookup.
MRCOOL DIY 5th Gen: Which Sizes Are 115V and What That Means
The MRCOOL DIY 5th generation line includes single-zone and multi-zone heat pump systems with wall-mounted, ceiling cassette, and hybrid ducted air handler indoor units. Multi-zone condensers support up to six indoor heads depending on the model, up to roughly 55,000 BTU of connected indoor capacity.
- Voltage by capacity. The 9K and 12K BTU units are rated 115V, 60Hz, single-phase. At 18K BTU and above the line moves to 208–230V and heavier wiring. Per MRCOOL's published electrical requirements: 9K and 12K on 115V take a 20A breaker and 12-2 wire; 18K on 208–230V takes 20A and 12-2; 24K takes 25A and 10-2; 36K takes 35A and 8-2.
- 115V does not mean plug-in. MRCOOL DIY 115V condensers ship without a factory plug cord. The manuals show terminal block connections (L, N and ground) intended for hard-wiring through an outdoor disconnect, not a receptacle. This is the single most common misreading of the spec sheet: buyers see "115V" and picture an extension cord.
- Where Zone Air differs. Zone Air's 115V systems are specified around a dedicated 15 amp single-pole circuit with the electrical connection made outdoors at the condenser, and a 6 ft 12 AWG NEMA 5-15P cord kit is sold separately for owners who want a plug instead of a hard-wired landing. That is a real difference in how the two platforms are engineered, not a marketing line — but it is a dedicated GFCI outlet either way.
The 5th Gen platform uses R-454B refrigerant across the lineup. The 12,000 BTU 115V model (DIY-12-HP-WM-115D25-O) is ENERGY STAR certified at 23.5 SEER2, 12.5 EER2 and 10.2 HSPF2, rated for heating operation down to −13°F, and ships with a 25 ft pre-charged line set. It includes a smartphone app for remote control, with Amazon Alexa and Google Assistant compatibility.
Understanding 120V 15 Amp Requirements for a DIY Mini Split Installation
Correct amperage and voltage sizing prevents overheating, nuisance breaker trips, and fire hazards. Here is what the numbers actually say for MRCOOL DIY 5th Gen 115V models.
| System | Voltage | Breaker | Wire | Connection at the condenser |
|---|---|---|---|---|
| MRCOOL DIY 5th Gen 9K | 115V | 20A dedicated | 12-2 min, 10-2 preferred | Terminal block, hard-wired via disconnect |
| MRCOOL DIY 5th Gen 12K | 115V | 20A dedicated (MCA 18A / MOCP 20A) | 12-2 min, 10-2 preferred | Terminal block, hard-wired via disconnect |
| Zone Air DIY 12K 115V | 110–120V | 15A single-pole dedicated | Per local code for a 15A circuit | Outdoors at the condenser; optional NEMA 5-15P cord kit |
- MCA and MOCP are not the same number. The nameplate on the DIY 12K 115V condenser lists a Minimum Circuit Ampacity of about 18A and Maximum Overcurrent Protection of 20A. MCA sizes the wire; MOCP caps the breaker. The matching air handler draws around 3A and is fed from the outdoor unit, so the system is one circuit, not two.
- A dedicated circuit is not optional. Mini splits run as continuous or high-duty-cycle loads, especially in heating mode. Startup current stresses wiring and breakers, and sharing a circuit with a refrigerator, a compressor, or shop tools invites nuisance trips that look like equipment faults.
- If a receptacle circuit is permitted, size it correctly. Use 12 AWG minimum for a 20A circuit and 14 AWG for a 15A circuit, with GFCI or AFCI protection where the code edition and location require it. Recent NEC editions require GFCI protection for outdoor receptacles. Confirm the outlet is grounded and dedicated.
- What the DIY label does and does not cover. No specialized tools are needed on the refrigerant side. The electrical side is held to the same standard as any other appliance circuit, and your inspector will treat it that way.
Pre-Charged Quick Connect Line Set and DIY Pro Cable: How the Refrigerant Side Works
The reason MRCOOL DIY 5th Gen systems qualify as a homeowner installation is the pre-charged line set and the DIY Pro cable. They eliminate vacuum pumps and brazing equipment entirely — no vacuuming, no flaring, no field charging.
- Line set sizing. MRCOOL's DIY listings map 1/4" × 3/8" sets to 6K–12K systems and 1/4" × 1/2" sets to 9K–18K systems, factory pre-charged with R-454B. Match the set to the BTU and series of your system rather than to a generic chart.
- Lengths. Standard pre-charged lengths are 16, 25, 35 and 50 ft; most complete 5th Gen kits include the 25 ft set. Couplers can join sets for runs up to roughly 75 ft, but each joint is another sealed fitting that must be torqued to spec and leak-checked.
- Sealed until installed. Each quick connect line set ships factory-sealed. The fittings must stay clean and capped until the moment of connection, and they open only when properly torqued together, keeping refrigerant in and contaminants out.
- The DIY Pro cable. It matches the line set length and carries power and control signaling between the outdoor condenser and the indoor air handler. It must match the BTU and series of your 5th Gen system.
- Never cut a pre-charged line. Excess length gets coiled neatly, not trimmed. Cutting one vents the charge, ends the no-vacuum install, and takes the warranty with it.
For how MRCOOL's fixed-length sets compare with custom-cut single-run alternatives, see our pre-charged line set comparison and the quick connect brand roundup.
Step-by-Step: Installing a MRCOOL DIY 5th Gen System on a 120V Circuit
These steps cover a typical single-zone MRCOOL DIY 5th Gen 9K–12K BTU, 115V model. Most installs run four to eight hours for two people. Size the system first — an oversized head short-cycles and never dehumidifies properly — using a mini split sizing calculator or a Manual J estimate.
- Step 1 — Plan the layout. Choose the room and wall for the indoor air handler with the clearances the manual specifies above and to each side. Choose the outdoor condenser location, measure the total line set run including vertical rise, and pick the next standard length up. Avoid sharp bends; the pre-charged set has a minimum bend radius.
- Step 2 — Prepare the electrical. For MRCOOL DIY 5th Gen 115V condensers, install a dedicated 20A single-pole breaker per the nameplate MOCP, run 12-2 minimum to an outdoor disconnect within sight of the unit, and follow your adopted NEC edition and local amendments. For a Zone Air 115V system, verify the 15A circuit is dedicated, correctly grounded, and — if you are using the cord kit — terminated in a GFCI outlet with a weatherproof in-use cover.
- Step 3 — Mount the indoor air handler. Secure the mounting plate to studs, level it, and drill the wall penetration the manual calls for (3" to 3-1/2" on most DIY wall-mount heads), angled slightly downward toward the outside so condensate drains. Feed the line set, condensate hose and DIY Pro cable through the sleeve, then hang the air handler.
- Step 4 — Place and secure the outdoor unit. Set the condenser on a stable pad or wall bracket with the ventilation clearance the manual specifies — typically around 12" behind and 24" or more in front of the coil. Mount the electrical disconnect within sight of the condenser.
- Step 5 — Connect the pre-charged quick connect line set. Route the insulated lines between the units without kinking them. Start every fitting by hand to avoid cross-threading, then use the two-wrench method — one wrench backing up the fitting on the unit, one turning the nut — and torque to the manual's spec. Do not cut the lines to adjust length; coil the excess.
- Step 6 — Wire the DIY Pro cable. Match terminal labels between the air handler and the condenser exactly as shown in the 5th Gen wiring diagram. Confirm every set screw is tight and that strain reliefs are clamped on the jacket, not on the conductors. A cable landed one terminal off is the most common cause of a first-start communication fault.
- Step 7 — Final electrical connection. For the hard-wired MRCOOL unit, connect the condenser to the disconnect and breaker using approved conduit and fittings. For a Zone Air 115V system with the cord kit, plug into the dedicated 15A receptacle only after every mechanical connection is complete.
- Step 8 — Open the valves, leak-check, and start up. Open the service valves per the manual to release the charge into the system, then soap-test every quick connect joint and watch for bubbles, oil residue or frost. If you find any, close down and contact support before energizing. Then restore power, start in cooling mode from the remote or app, and verify the temperature drop across the indoor coil.
Cold Weather, Multi-Zone and Hybrid Air Handler Options
The 5th generation platform delivers more than an easy install. These are the features that decide whether it fits the space you are conditioning.
- Cold weather operation. Standard DIY 5th Gen wall-mount models are rated for heating operation down to −13°F, holding close to full rated capacity near 5°F. MRCOOL's Hyper Heat models, offered in sizes including 12K and 18K, extend that to roughly −22°F — worth the premium in a garage or bonus room in a genuinely cold climate.
- Multi-zone configurations. DIY multi-zone condensers support up to six indoor air handlers depending on model, mixing wall-mounted heads, ceiling cassettes and ducted units. Each zone is independently controlled by remote, app or smart assistant. Note that the DIY ducted option is a separate Hybrid Air Handler product tied to existing ductwork, not a slim concealed-duct head you drop into any multi-zone layout.
- Smart controls. Wi-Fi app control on iOS and Android, Alexa and Google Assistant compatibility, and Follow Me, which uses the remote's own temperature sensor so the system targets the spot where people actually sit. Settings are restored after a power outage.
Planning more than one room? See the 3-zone DIY comparison and the multi-zone concealed duct guide.
Safety, Warranty, and When to Call a Professional
Even though MRCOOL DIY 5th Gen and Zone Air DIY systems are designed for homeowners, the safety and warranty rules still apply.
- Safety basics. De-energize the circuit at the panel before touching any wiring and confirm it with a non-contact voltage tester. Never open the refrigerant circuit or attempt to add charge in the field. The quick connect line set is factory-sealed and should stay that way.
- Code and permitting. Local building departments commonly require a permit for a new circuit and for the HVAC installation itself. Check the NEC edition your jurisdiction has adopted for GFCI and AFCI requirements on outdoor and bedroom circuits. A UL or ETL listing mark on the unit's data plate confirms the equipment was tested to a recognized safety standard, but it does not substitute for local approval.
- Warranty. The MRCOOL DIY 5th Gen warranty runs 5 years on parts and 7 years on the compressor with no registration required, as long as the system is installed per the manual using MRCOOL's pre-charged line sets. Cutting or altering a pre-charged line set, or substituting non-approved accessories, is what puts that coverage at risk. Zone Air's published warranty is structured the same way around homeowner installation.
- When to hire a pro. Call a licensed electrician if you are not confident installing a new circuit and disconnect, or verifying that the panel has capacity. Get help before you start if the home has aluminum branch circuits, knob-and-tube, or an undersized service. If the unit trips the breaker repeatedly or throws a code at start-up, stop and diagnose rather than resetting it.
Before buying either brand, it is worth reading owner feedback rather than retailer star ratings alone — MRCOOL's Trustpilot profile sat at 3.2 out of 5 across 89 reviews, with 47% one-star, in September 2026, and the recurring themes are support responsiveness and warranty handling rather than the hardware itself. Certified performance data for any model is in the AHRI Directory, and efficiency tiers are listed under ENERGY STAR's ductless category.
Combining a DIY-friendly pre-charged mini split with professional electrical help is usually the safest and most cost-effective outcome. Confirm your panel capacity and circuit availability first, let the pre-charged quick connect handle the refrigerant side, and the system runs in a single weekend.
FAQ: MRCOOL DIY 5th Gen 120V Installation
Can you plug a MRCOOL DIY 5th Gen into a standard 120V wall outlet?
No. The 115V DIY 5th Gen condensers ship without a factory cord and land on a terminal block for a hard-wired connection. The 12K condenser's nameplate lists a minimum circuit ampacity of 18 amps and maximum overcurrent protection of 20 amps, and MRCOOL's own electrical guide calls for a 20 amp breaker with 12-2 minimum wire on both the 9K and 12K. A standard 15 amp NEMA 5-15 receptacle circuit is undersized for it.
What breaker size does a MRCOOL DIY 5th Gen 12K 115V need?
A dedicated 20 amp breaker, with 12 AWG wire as the minimum and 10 AWG preferred for longer runs. The nameplate MCA of 18 amps sizes the wire; the MOCP of 20 amps sizes the breaker. The indoor air handler is fed from the outdoor unit, so it is one circuit, not two.
Which 115V mini split actually plugs in, then?
Zone Air's 115V DIY systems are built around a dedicated 15 amp single-pole circuit, and Zone Air sells an optional 6 ft NEMA 5-15P cord kit that converts the outdoor connection to a plug. Even then it is a dedicated 15 amp GFCI outlet with a weatherproof in-use cover, where local code allows, never an extension cord or a shared receptacle.
Do you need a vacuum pump or an EPA license to install a MRCOOL DIY 5th Gen?
No. The pre-charged quick connect line set is sealed and charged at the factory, so you never open the refrigerant circuit, never braze, and never evacuate. EPA Section 608 certification applies to opening a refrigerant circuit, which a quick connect install does not do. The electrical side is the part that may still need a licensed electrician.
Does DIY installation void the MRCOOL 5th Gen warranty?
No. MRCOOL's DIY 5th Gen warranty is 5 years parts and 7 years compressor with no registration required, provided the system is installed per the manual using the pre-charged line sets. Altering or cutting a pre-charged line set, or substituting non-approved parts, is what puts coverage at risk.
How long can the pre-charged line set be?
MRCOOL sells DIY quick connect line sets in 16, 25, 35 and 50 ft lengths, with the 25 ft set included in most complete 5th Gen kits. Couplers can join sets for runs up to roughly 75 ft, but every added joint is another sealed fitting that has to be torqued and leak-checked.
Electrical specifications, efficiency ratings, prices and warranty terms above are manufacturer- or retailer-published as of September 2026 and are subject to change; verify the nameplate on your own unit and the current manual before wiring anything. Nothing here replaces your local code, your permit, or a licensed electrician. MRCOOL and Zone Air are trademarks of their respective owners. DIY HVAC Tools is not affiliated with or endorsed by either.