Best DIY Ceiling Cassette Mini Split: MRCOOL Install Guide and How Zone Air Compares
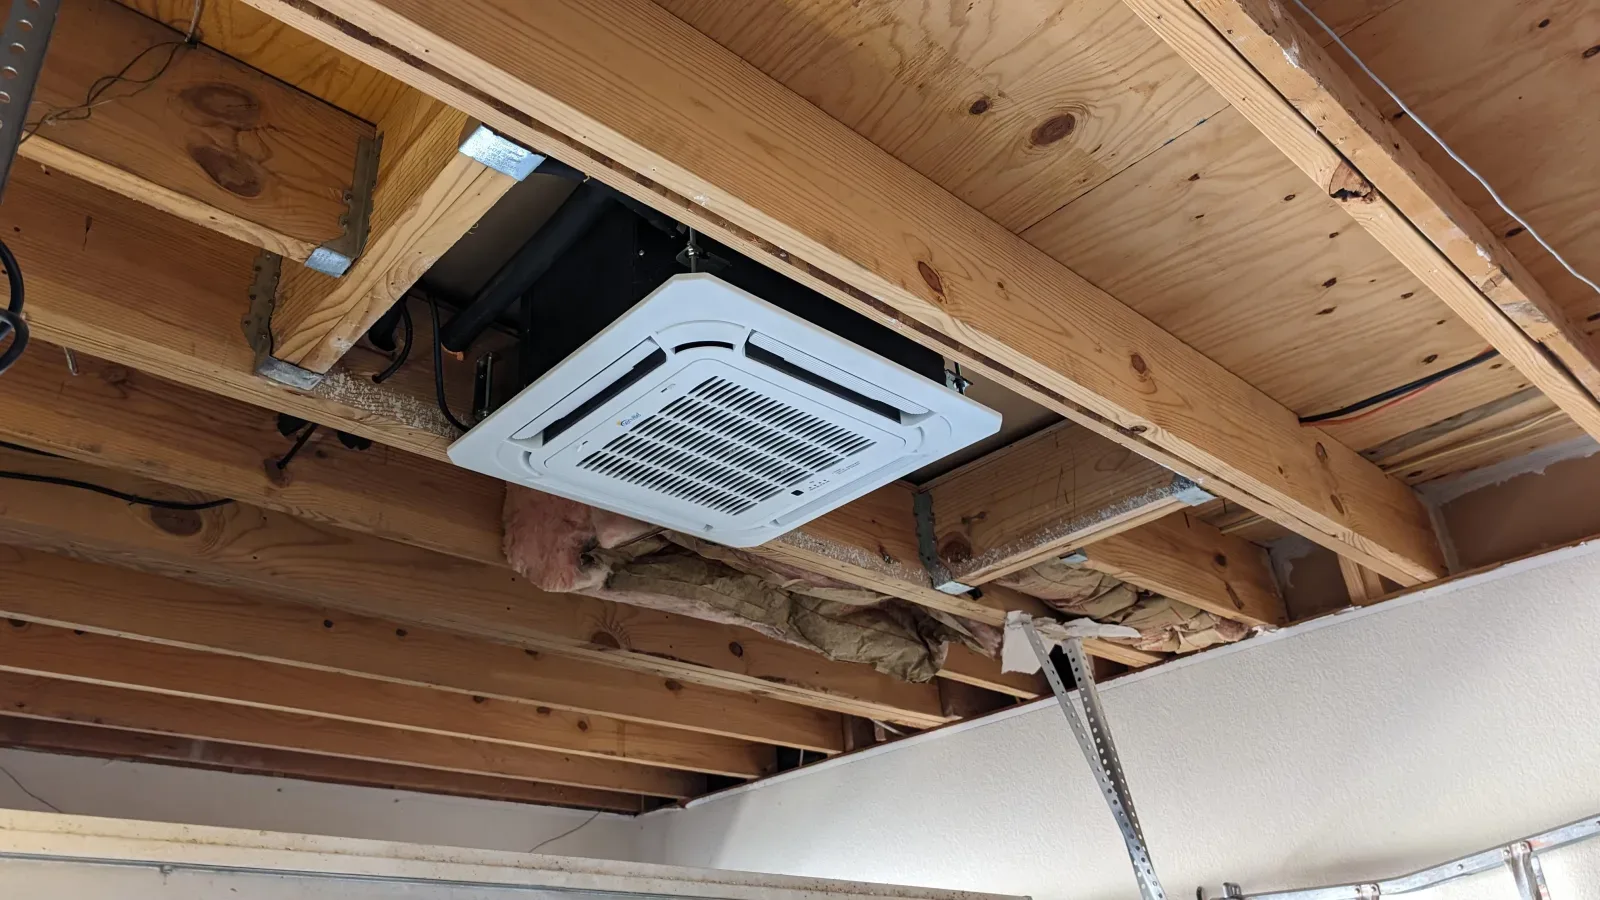
If you are searching for the best DIY ceiling cassette mini split that MRCOOL offers, you are already on the right track. A ceiling-recessed unit gives you clean looks and even air distribution that wall-mounted heads just cannot match. But the install takes more than energy, and you'll want to know what you're getting into before you start cutting into your ceiling.
Is a MRCOOL DIY Ceiling Cassette Mini Split Worth It?
A MRCOOL DIY ceiling cassette mini split can be a good choice if you want efficient, quiet cooling and heating without a bulky unit on your wall. These systems have heating and cooling in a simple design that fits with your decor. Zone Air sells its own DIY ceiling cassette systems, and this guide is here to help you choose and plan a cassette project safely, because even when a project sounds simple on paper, there are usually hidden problems behind the scenes.
Here are the top benefits right away:
- No visible wall unit. Only a low-profile grille shows below your ceiling, so your walls stay free for furniture, TVs and art. Your living room doesn't need to look like a museum show filled with groups of HVAC equipment.
- Comfortable air distribution. Ceiling-mounted units spread air across the room more evenly than wall-mounted units. That cuts down on hot and cold spots.
- Modern look. MRCOOL's OuttaSight ceiling cassette has a flush-mount design that you can barely see.
- DIY-focused design. Pre-charged line sets and quick-connect fittings mean the MRCOOL installation process doesn't need EPA certification for the refrigerant side.
- Strong manufacturer support (2024–2026). MRCOOL has expanded its product line with 5th Gen models, improved SEER2 ratings and a better warranty plan.
Who this is for: you, if you're working on a finished basement, open-plan living room, bonus room, shop with low walls or any space where wall-mounted units aren't practical.
With planning, sizing, tools, step-by-step installation and common mistakes to avoid covered in the rest of this article, you can tackle this project with confidence.
What Is a Ceiling Cassette Mini Split?
A ceiling cassette mini split is an indoor unit that sits back into the ceiling structure, leaving only a grille visible from below. It is connected to an outdoor condenser by refrigerant lines and electrical cables, just like any other split system. Where the unit lives and how it moves air is the key difference.
A split system makes heating and cooling more efficient because it keeps the noisy compressor and condenser outdoors while the quiet indoor head handles air distribution. Cassettes are able to push conditioned air in multiple directions. It can be one-way or four-way depending on the model. That plays a big role in comfort across larger spaces.
| Feature | Ceiling Cassette | Wall-Mounted | Floor-Mounted |
|---|---|---|---|
| Visible profile | Minimal (grille only) | Large unit on wall | Large unit near floor |
| Airflow pattern | Multi-directional, wider coverage | Mostly horizontal | Upward, limited reach |
| Install complexity | Structural ceiling work required | Wall plate mount, simpler | Floor placement, furniture interference |
| Maintenance access | Filter drop panel or ceiling access | Front-accessible filter | Floor level, easy but exposed |
The point you might overlook is that cassette-style heads need enough joist space, attic access and a solid drainage plan. MRCOOL's easiest DIY installs are its wall-mounted units, while cassette installs are more advanced. That's why good planning, or a qualified pro for the hard parts, often makes the difference between a smooth install and a frustrating one.
Why MRCOOL Is a Popular DIY Mini Split Brand
MRCOOL has become the big name in the DIY mini split world, and there's a clear reason you keep searching for the best DIY MRCOOL split. Making HVAC accessible to non-professionals is what the brand's entire development approach centers on.
Here's what gives MRCOOL the lead:
- Pre-charged Quick-Connect line sets. You can use insulated copper lines for refrigerant transport without a vacuum pump or refrigerant charging tools. Earlier models used R-410A refrigerant, while the 5th generation of MRCOOL models uses R-454B refrigerant and differs in installation requirements from earlier models.
- Lower environmental impact. R-454B refrigerant has a lower global warming potential than R-410A systems. That fits with updated regulatory standards.
- Clear documentation. Both printed installation manuals and online resources have expanded a lot. The production quality of MRCOOL's guides includes wiring diagrams, cut-out dimensions and clearance tables.
- High efficiency. SEER2 ratings up to 23.5 on the 12K single-zone condenser the cassette pairs with (21.2 on the 18K) deliver real value on monthly energy bills.
MRCOOL's standard DIY 5th Gen warranty is 5-year parts and 7-year compressor, and no registration is needed. There is also the paid MRCOOL Care Program ($14.99 a month). While you stay enrolled, MRCOOL sends a replacement compressor if it ever fails, and a full outdoor unit if it fails in the first 7 years. The Care Kit itself can't be used on the OuttaSight air handler, only on the condenser.
MRCOOL's DIY series is designed for non-HVAC pros, but ceiling cassette installs still demand solid carpentry and electrical skills. No formal training is needed on the refrigerant side, yet the structural and electrical work is no joke. This history of accessible design, combined with a recent release of 5th Gen OuttaSight models, is why MRCOOL ends up on a lot of DIY shortlists. Zone Air is a competing brand, and its Airframe cassettes (9,500 and 12,000 BTU, 21 SEER2) are worth comparing too. The DIY home improvement scene has appeared to embrace MRCOOL more than any other brand. That kind of community support matters.
Ceiling Cassette vs Wall-Mount for DIY
Cassette units are more hidden, but they are absolutely not the simplest DIY path. Here's an honest comparison.
Ceiling cassette pros:
- Invisible presence. There is no wall clutter, so you can keep your layout for TVs, shelving and artwork.
- Multi-directional airflow covers more area. MRCOOL cassettes can push up to about 400 CFM in Turbo mode.
- MRCOOL's units are designed for quiet operation. On the quietest fan setting, listed sound levels are 23.5–26 dB(A), and that is quieter than a whisper.
- Better comfort in large rooms, open-plan spaces like combined kitchen-living spaces, and rooms with high ceilings.
Ceiling cassette cons:
- Needs cutting into drywall and potentially modifying framing. It is a bit more labor-intensive than hanging a wall bracket.
- Condensate drainage must be sent through the ceiling, and that needs either gravity fall or a condensate pump.
- More tools are needed, there is more time on ladders. There are tighter safety concerns with overhead work.
- MRCOOL clearance requirements are specific: faceplate to wall must be at least 7.9 inches, and minimum ceiling height is about 7.6 feet.
Noise comparison: Cassette placement inside the ceiling cavity softens operating sounds, making them less noticeable to you in the room compared to a wall unit at ear level.
Guidance: For pure DIY beginners, a wall-mounted MRCOOL DIY split makes more sense. For you, if you're an intermediate DIYer comfortable with structural work, a ceiling cassette is reasonable with careful planning.
Planning Your DIY Ceiling Cassette Project
Most DIY success comes from good planning, not from the part that sounds simple on a YouTube video. As someone who watches install videos, it's easy to underestimate what happens before the camera starts rolling.
Key planning tasks:
- Room-by-room load calculation. Use a Manual J–style assessment to determine needed BTUs. Don't just guess based on square footage. Research your insulation levels, window exposure and occupancy patterns.
- Verify ceiling structure. Check joist spacing, depth and identify any existing plumbing, wiring or ductwork in the ceiling cavity. You should develop a clear picture of what's above before you cut anything.
- Check attic access. You'll need space above the cassette for refrigerant lines, electrical connections and future maintenance access.
- Pre-plan refrigerant and drain paths. You can map out the complete path from indoor unit to outdoor unit, and account for turns, wall penetrations and where the condensate ends.
- Consult local building and electrical codes. Follow local building codes during installation. Permits may be required in your jurisdiction, and skipping them can create issues during a home sale or insurance event. Take time to write down permit requirements before purchasing equipment.
- Plan for future expansion. Multi-zone MRCOOL condensers can run up to 6 zones. If you're thinking of adding cassettes or wall units later, size the outdoor unit correctly from the beginning.
Zone Air has a sizing calculator on its site that can help at this stage, and its live tech support (7AM–7PM MST) is there for Zone Air systems. For a MRCOOL install, MRCOOL's own support is the place to call before costly mistakes happen.
Choosing the Right Size MRCOOL Ceiling Cassette
BTU sizing is one of those details that can make or break your comfort. Oversizing leads to short cycling, excess humidity and wasted energy. Undersizing can leave you suffering through temperature ups and downs with the system running all the time.
MRCOOL's ceiling cassette OuttaSight line comes in these estimated capacity ranges:
| Model Size | Coverage (Ideal Conditions) |
|---|---|
| 6,000 BTU | Up to ~250 sq ft |
| 9,000 BTU | Up to ~400 sq ft |
| 12,000 BTU | Up to ~550 sq ft |
| 18,000 BTU | Up to ~800 sq ft |
Special considerations that affect sizing:
- High ceilings increase needed BTUs because you're conditioning volume, not just floor space.
- Large or west/south-facing windows create a lot of heat gain.
- Open floor plans may need higher capacity or multiple heads to avoid dead zones.
- Rooms with heavy heat loads (kitchens, home gyms, server rooms) need additional capacity.
Online calculators are only a starting point. Zone Air recommends at least a basic Manual J–style assessment for accuracy, especially with ceiling cassette jobs where airflow patterns differ from wall units. For example, a 500 sq ft room with 10-foot ceilings and large windows might need a 12K or even 18K unit rather than the 9K that a simple calculator would suggest.
The MRCOOL DIY ceiling cassette supports both single-zone and multi-zone configurations. A multi-zone condenser can power a mix of ceiling cassette and wall-mount heads, and that gives you flexible layouts throughout the house. Ceiling cassettes can provide effective heating down to sub-zero temperatures when paired with MRCOOL's Hyper Heat condenser options.
Ceiling Cassette Structural and Space Needs
The biggest difference between a standard DIY wall unit and a cassette is the structural work in the ceiling. This section is where your background in carpentry matters.
Typical MRCOOL cassette indoor head dimensions:
- Length: ~50.31 inches (1278 mm)
- Width: ~13.19 inches (335 mm)
- Depth: ~8.98 inches (228 mm)
The ceiling opening (cut-out) for 4th Gen models measures about 51.2 inches × 16.9 inches. Ceiling thickness should not exceed about 0.625 inches.
Critical structural checks:
- MRCOOL's ceiling cassette sits back between standard 16-inch ceiling joists. Verify your joist spacing before you buy. The unit must fit without cutting or compromising structural members.
- If the cassette cannot be placed between existing joists, a licensed contractor should safely frame an opening. Never cut load-bearing members without professional assessment.
- Install the indoor unit at least 7 feet high. MRCOOL says a minimum ceiling height of about 7.6 feet is needed, with faceplate-to-wall clearance of at least 7.9 inches and side clearances of about 19.7 inches.
- Above the cassette, ensure enough space for refrigerant lines, electrical whip and condensate drain routing. This form of overhead work needs careful attention to what's already filled in the cavity.
Common obstacles in the ceiling space include plumbing lines, existing ductwork, beams or girders, fire blocking, electrical wiring and insulation or vapor barriers. All of these must be mapped before the building work begins.
Electrical Requirements and Safety
Electrical work is the one area where many DIYers wisely bring in a licensed electrician. MRCOOL's documentation repeatedly states that all electrical connections must comply with local and national codes.
Here are typical specs for MRCOOL ceiling cassette systems:
- Single-phase 208/230V, 60 Hz power supply
- Indoor units draw relatively low current (about 0.8–1.2A RLA), but outdoor units need a lot more
- For example, MRCOOL's catalog lists the 12K single-zone Hyper Heat outdoor unit at an MCA of 15A with a 15A maximum fuse, and the 18K at 19A and 25A. Go by the nameplate on your own unit for breaker and wire size
The rule for safe electrical work is:
- Dedicated breaker sized according to the outdoor unit's MCA/MOP nameplate-never exceed the maximum overcurrent protection rating
- Disconnect switch installed near the outdoor unit per NEC requirements
- Proper wire gauge accounting for the transfer distance (longer runs need heavier gauge to avoid voltage drop)
- GFCI/AFCI protection where required by local code, especially for outdoor or wet locations
- Bonding and grounding per NEC or locally applicable standards
If you're not absolutely comfortable working in your electrical panel, Zone Air recommends hiring a licensed electrician for that portion. The rest of the install can stay DIY. This hybrid approach keeps your savings while keeping safety front and center.
Tools and Materials for DIY Ceiling Cassette Install
Having every tool on site prevents costly mid-project delays. Here's a complete checklist.
Tools:
- Stud/joist finder
- Drywall saw or oscillating multi-tool
- Level (laser preferred for ceiling work)
- Tape measure
- Wrench set (for the Quick Connect line set fittings, per MRCOOL's manual)
- Hole saw is for drain and line penetrations
- Fish tape for routing cables
- Cable staples and standard hand tools
- A bit of patience. Ceiling work always takes longer than you think
Safety gear:
- Eye protection
- Work gloves
- Respirator or dust mask (ceiling cutting creates a lot of debris)
- Hearing protection
- Stable ladders or scaffolding. Never use chairs or stacked boxes
Materials:
- Mounting hardware and brackets are for the cassette
- Vibration isolation pads are for the outdoor unit
- Line set covers or protective conduit
- Condensate tubing or pump kit
- Electrical whip kit, correct gauge wiring, breaker and disconnect switch
MRCOOL DIY kits usually include pre-charged line sets and control cables, and that is the key point that makes the refrigerant side simpler. You'll still need to supply drainage materials, electrical components and any structural reinforcement yourself.
Installing a MRCOOL Ceiling Cassette System
This section provides a high-level overview. MRCOOL has a detailed installation video you should watch before beginning. MRCOOL offers DIY ceiling cassette mini split systems designed for easy installation by you, but following the correct sequence is critical.
Stage 1 - Site Prep
- Power is turned off to the work area at the breaker
- Mark the ceiling opening location based on MRCOOL's cut-out dimensions
- Verify joist layout and check for utilities above the ceiling
Stage 2 - Cutting and Framing
- Cut the ceiling opening carefully per specified dimensions
- Reinforce framing if needed to support the unit weight
- Protect furniture and electronics below. The debris is real
Stage 3 - Hanging the Cassette
- Insert the unit into the opening
- Secure using screws or mounting ears
- Confirm the unit is perfectly level (this is critical for condensate drainage)
Stage 4 - Routing Lines and Drain
- Insulated copper lines are used for refrigerant transport
- The condensate drain is routed with proper slope
- Insulate all lines to prevent condensation
Stage 5 - Outdoor Unit
- Place on a concrete pad or wall bracket with proper airflow clearance
- Ensure vibration isolation
- Refrigerant lines are connected to the outdoor unit
Stage 6 - Electrical Connections
- Run the indoor-to-outdoor control cable
- Connect the outdoor power feed
- Install the breaker and disconnect switch
Stage 7 - Leak Checks and Startup
- Check for leaks after connecting refrigerant lines
- Refrigerant valves are opened per MRCOOL's manual sequence
- Run initial tests in both cooling and heating modes
- Verify condensate drainage is flowing correctly
Condensate Drainage and Moisture Control
Water management is one of the most critical points for ceiling cassette installs. A leak above a finished ceiling can cause expensive damage and mold growth. The nature of gravity means water always finds the weakest spot.
Ensure proper drainage for the condensate line by following these guidelines:
- Gravity drain is preferred when the ceiling cavity allows a downward slope to an appropriate termination point. Check the MRCOOL manual for the drain line size on your unit.
- Condensate pump is needed when gravity drainage isn't possible. Size the pump for the expected condensate volume.
- Drain line pitch should be at least ¼ inch per foot. Include a trap or vent if the manufacturer recommends it to prevent airlock.
- Condensate safety switches (float switches) are something Zone Air strongly recommends under finished ceilings. If water backs up, the switch is able to shut down the unit before damage occurs.
- Insulate drain lines in humid climates to prevent sweating and hidden moisture problems that can develop over time.
Periodic maintenance checks should include flushing the drain line, inspecting for blockages and checking that the unit stays level.
Commissioning, Tuning and Smart Control Integration
Commissioning is your first detailed startup, and a proper explanation of what to check can save you headaches later. This is where you verify the system's functionality matches the specs.
- Check supply and return air temperatures. You should see a consistent temperature difference of 15–22°F across the coil in cooling mode.
- Listen for unusual sounds. Rattling, grinding or hissing show loose parts or potential refrigerant issues.
- Confirm cassette vane operation. All vanes and dampers should move smoothly through their full range.
- Configure the remote control. MRCOOL's systems include a remote control for convenience, and many models support Wi-Fi via the SmartHVAC app for integration with Alexa or Google Home.
- Fine-tune advanced settings. Fan speed profiles, sleep modes, scheduling and economy modes help maximize comfort and efficiency. These improvements in setting can reduce power consumption once the system is established.
If you bought a Zone Air system, its live tech support can help you with readings and function checks during commissioning to make sure the system is delivering what it should. For a MRCOOL system, call MRCOOL support.
Common DIY Mistakes With Ceiling Cassette Mini Splits (and How to Avoid Them)
Even you as an experienced DIYer can slip up on details that don't seem like a big deal at first. Here are the most frequent errors and the fixes that prevent them:
- Mis-sized openings. Cutting too small or misaligning the opening creates struggle during unit insertion and can block airflow. Measure twice, cut once.
- Poor cassette leveling. Even a slight tilt causes condensate to pool incorrectly, leading to leaks and water stains. Every error in leveling is able to compound over time.
- Kinked or poorly insulated line sets. This reduces efficiency and can cause mechanical failure. Handle line sets gently and follow bend radius specifications.
- Inadequate drain slope. Without proper pitch, water backs up. This is a suffering that's completely preventable with a level and careful routing.
- Loose electrical connections. This can cause overheating, tripped breakers or fire risk. Torque all connections to spec.
- Ignoring clearance requirements. Too close to walls or obstructions reduces airflow and may void your warranty.
- Skipping permits or inspections. During a home sale or insurance claim, missing permits can cause serious problems. Check your local requirements.
- Underestimating debris. Ceiling cutting creates a surprising amount of dust and drywall pieces. Protect everything below with drop cloths.
Most of these issues are preventable with a measured pace, double-checking the MRCOOL manual and planning ahead. The story of a successful install is almost always one of careful preparation, not rushing.
Maintenance, Filters and Long-Term Reliability
Even the best DIY MRCOOL split needs regular care for a 10–15+ year lifespan. Here's what will preserve performance over the long run:
- Clean or replace cassette filters regularly. MRCOOL's OuttaSight models have elevation filter panels that drop down for easy access. During peak seasons, monthly checks are wise. Otherwise, inspect every season.
- Wipe down grilles and periodically remove them to clean inside the cassette where dust collects.
- Clean the outdoor coil at least annually. Remove leaves, debris and snow buildup to maintain airflow.
- Check for unusual noises or vibration that may show loose components or fan imbalance.
- Keep records of all maintenance. This supports warranty claims and shows responsible ownership.
Zone Air recommends a professional checkup every few years to maintain efficiency. Think of it like a university-level audit of your system's health. It catches small issues before they become expensive problems.
When DIY Isn't Best
Some projects that initially sound simple are actually high-risk or beyond your comfort zone. Here are the red flags:
- Complex electrical panels with limited spare capacity or non-standard configurations
- Structural modifications to load-bearing joists that need engineering assessment
- Multi-story line runs through complex wall and ceiling assemblies
- Strict HOA or historical-district rules that limit outdoor unit placement or need specific approvals
- Physical limitations that make sustained overhead work unsafe. Working above your head on a ladder is demanding
An alternative to full DIY is a hybrid approach: you handle prep work, framing and mounting while a locally found pro finishes the refrigerant connections and electrical work.
Choosing help where needed protects both safety and the long-term performance of the MRCOOL system. There's no shame in establishing clear boundaries for your own skill set.
Zone Air's Own DIY Ceiling Cassette
Zone Air focuses on mini split systems and sells its own DIY ceiling cassettes, so it is a MRCOOL competitor and not a MRCOOL installer. Here's what Zone Air has if you want to compare:
- Its own cassette systems. The Airframe ceiling cassette comes in 9,500 and 12,000 BTU single-zone sizes at 21 SEER2 on 230V, and in dual and 3-zone systems.
- Live tech support. You can call 7AM–7PM MST for help while you install a Zone Air system.
- A built-in condensate pump. Each Zone Air cassette has an integrated condensate pump, so you don't have to rely on gravity drainage.
- Pre-charged linesets. For cassette systems they are sold separately, from 16 to 75 ft.
- Warranty. It is 5-year parts and 7-year compressor, and a DIY install doesn't void it.
Zone Air doesn't install MRCOOL systems. If you're comparing brands, you can contact Zone Air with your room dimensions, ceiling photos, climate zone and goals.
Summary and Next Steps
A MRCOOL ceiling cassette mini split offers clean looks and excellent comfort, but it demands more planning and skill than a basic wall mount. Here are your key points:
- Size carefully. A proper load calculation prevents oversizing and undersizing, and both waste money and reduce comfort.
- Check your structure. Joist spacing, depth and existing obstacles in the ceiling cavity are non-negotiable items to verify before you buy.
- Plan drainage thoroughly. Condensate management protects your ceiling and prevents mold.
- Handle electrical safely. Follow local codes, use proper wire gauge and hire an electrician if you're not confident.
Before buying anything, make a simple checklist from this article. Include room dimensions, ceiling cavity depth, joist spacing, drain routing options, electrical panel capacity and a tool inventory. Zone Air's site has an installation manual and video guides for its own systems that can help you organize the details.
The bottom line: the best DIY ceiling cassette mini split MRCOOL project is one that's planned well before the first cut. If you want to compare a Zone Air cassette before you buy, reach out to Zone Air with your room details and photos.
MRCOOL specifications, clearances and warranty terms above are from MRCOOL's published catalog and support documents as of October 2026 and are subject to change; verify the current terms for the exact model before you buy. Your unit's installation manual and local code take precedence over this guide. MRCOOL and OuttaSight are trademarks of their owner. DIY HVAC Tools is owned and operated by Zone Air, a competing brand, and is not affiliated with or endorsed by MRCOOL. This is not an official MRCOOL publication.