Plug-In DIY Mini Split for a 120V Outlet: Complete Guide to Zone Air's 115V Systems
120V Plug-In DIY Mini Splits What to Know
A plug-in DIY mini split for a 120V outlet lets homeowners cool and heat a single room using a standard 110–120V household outlet instead of a 230V hardwired connection. That means no panel upgrades, no heavy-gauge wiring runs, and no mandatory electrician visit just to get climate control into a space that needs it. DIY 120V mini split air conditioners simplify climate control installation for spaces that traditional HVAC systems struggle to reach.
With an optional outdoor plug-in cord kit, Zone Air's 9,000 BTU and 12,000 BTU mini split models are true 115V systems designed for dedicated 15A outlets where local codes allow. Both models ship with a quick-connect line set that comes precharged from the factory, so most homeowners don't need vacuum pumps, gauges or refrigerant experience to get up and running.
This article will answer whether you can "just plug in" a mini split, what's different about 120V models compared to the standard 230V systems, and when a Zone Air DIY mini split is the right choice for your project. If you want the full spec rundown on both sizes, see our 115V DIY mini split page, and for just the smaller model, the 120V mini split 9000 BTU guide.
Here's what you'll want to know upfront:
- With 9,000 and 12,000 BTU capacities, Zone Air's 115V systems cover rooms from about 250 to 600 square feet depending on how well insulated they are, ceiling height and your climate.
- 120V DIY mini splits work well in garages, bonus rooms, home offices, ADUs and older homes that do not have 230V circuits anywhere near the spot where you'd put the unit.
- 120V mini split units can heat and cool spaces efficiently without electrical upgrades in many homes that already have spare 15A circuit capacity.
- Before you buy, check whether your jurisdiction lets you plug a mini split into a standard 120V outlet. Some local codes require hardwired connections for outdoor condensers. Read the manufacturer specs carefully before you purchase to confirm it'll work with your electrical setup.
- With Zone Air's precharged quick-connect line sets, you can get past the two biggest obstacles to DIY HVAC installation. You do not have to handle refrigerant, and you don't need specialized tools.
How a 120V Plug-In Mini Split Works (and What Makes Zone Air Different)
A mini split system has two main parts: an outdoor condenser/compressor and an indoor wall-mounted air handler. These are connected by refrigerant lines that have insulation on them, a condensate drain and wiring that runs between the two units to control the system. Most residential mini splits run on 208–230V power, so you need a dedicated double-pole breaker, wire with a heavier gauge, and you often need to hire a licensed electrician. With standard North American 110–120V household current, Zone Air's 115V models flip that equation by running the compressor and electronics on what you already have in your walls.
Here is what is different about the way Zone Air's 120V plug-in approach works:
Electrical compatibility. The 9,000 BTU and 12,000 BTU 115V models both run on 110–120V, 60 Hz, single-phase power. They need a dedicated 15A circuit with a 15A single-pole breaker. A dedicated circuit is essential for safe mini split operation, and the unit must not share a circuit with other high-draw appliances like space heaters, refrigerators or power tools.
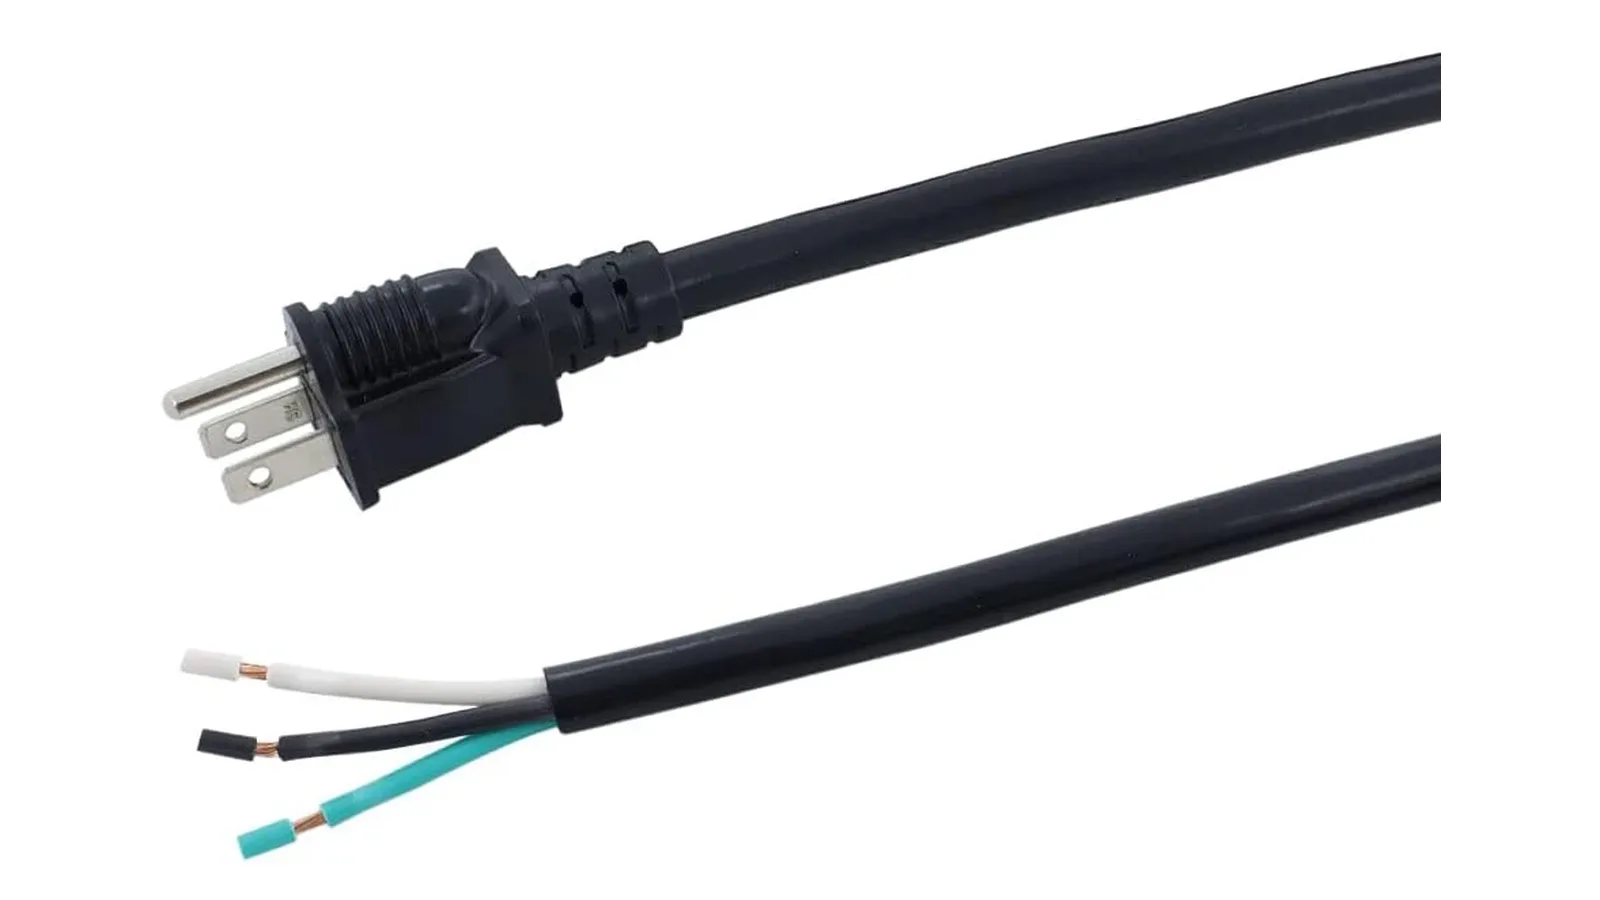
Plug-in cord kit. An optional 6-foot power cord (NEMA 5-15P, 12 AWG, $49.99) from Zone Air has a cut end that goes on the outdoor condenser's terminal block. Into a weatherproof, in-use 120V receptacle mounted near the condenser, the plug goes. It is the same plug shape as your kitchen or living room outlets, just installed outdoors with proper protection. You never plug in the indoor unit. Power connects at the outdoor unit.
Outlet requirements for plug-in installation:
- 120V (110–120V nominal), 15A dedicated circuit
- GFCI-protected outlet. For outdoor receptacles, GFCI protection is also required under the 2023 NEC and most local codes
- Exterior-rated receptacle with an in-use cover
- It's mounted close to the outdoor unit. The cord has strain relief on it
Efficiency. Both Zone Air 115V capacities are rated at 23 SEER2, which is competitive with a lot of 230V models. Typical window units fall in the 10–13 range, so a 23 SEER2 mini split uses about half the electricity to give you the same amount of cooling.
Inverter compressor and sound levels. Both units have variable-speed inverter compressors, which can ramp up and down based on demand instead of cycling on and off at full power. In mute mode, the indoor head is running as quietly as 30 dB(A), similar to a low voice across a room. It rises to about 46 dB(A) on Turbo. Around 52 dB(A) is where the outdoor unit sits, which is about the amount of sound you get from a modern refrigerator.
Precharged quick-connect line sets. Each single-zone Zone Air system comes with a 16-foot pre-charged line set in the box, and custom lengths are cut to any whole foot from 5 to 75 feet. Inside the factory, the refrigerant (R-454B, a lower-GWP replacement for R-410A) is measured and sealed. Pre-charged lines are eliminating the need for vacuuming and they are reducing the risk of leaks or contamination during installation. With wrenches, you'll tighten the fittings until they seat and seal: no vacuum pump is needed, no manifold gauges are needed, and no EPA Section 608 certification is needed.
Cold-climate performance. Both 115V models are rated to provide heating down to −13°F (−25°C) outdoor temperature. Heating COP2 is 3.81 at 47°F and it's still about 2.1 at 5°F. That is making these units suitable as primary heat in many U.S. climate zones and as strong supplemental heat in the coldest northern regions. How hot can it get outside and still cool? In summer they're rated to cool in outdoor temperatures up to 131°F.
True DIY versus "DIY in name only." Some "DIY" mini split kits still need 230V hardwiring by an electrician. Zone Air is different because it uses standard household voltage and has a plug-in option, so the electrical connection itself is homeowner-friendly where code allows, and you also get DIY refrigerant installation.
What Sets Zone Air Apart
- Custom-cut line sets. Zone Air cuts your pre-charged line set to the exact length you measure, any whole foot from 5 to 75. The longer standard lengths (25, 33, 50 and 75 ft) are each one continuous run with no field joint.
- A path to 230V and multi-zone. If you need more than 115V can give you, Zone Air's 230V single-zone units reach 24 SEER2. With the 115V models, Zone Air only gets 23 SEER2.
- Plug-in, not hardwired. Zone Air's 115V models can plug into a dedicated 15A outlet with the optional cord kit where local code allows, where MRCOOL's 115V units are hardwired.
- Mixed indoor styles. As of October 2026, Zone Air is the only DIY mini split that lets you mix wall-mount, ceiling cassette and concealed ducted units on one outdoor unit.
- Warranty and returns. You get 5-year parts and 7-year compressor coverage with no registration deadline, and installing it yourself does not void it. If you buy direct from Zone Air, you can get 30-day returns on uninstalled units.
- Built and checked in the USA. Zone Air systems get final assembly, testing, and inspection in the USA from globally-sourced components, and live technical support runs 8 AM–6 PM MT.
Planning and Installing a Zone Air 120V DIY Plug-In Mini Split
Zone Air systems are designed for homeowners, but installing a 120V mini split requires adherence to local electrical codes, basic safety practices and a clear plan before you pick up a drill. Check your local code adoption status, and consult a licensed electrician if you are unsure about circuit capacity or outlet placement. Zone Air's FAQ puts a single-zone wall install at 4–6 hours for two people doing it the first time and about 3 hours with experience, but that timeline assumes the electrical prep is already done.
Sizing and Planning
- Match capacity to room size. With the 9,000 BTU model, you get about 250–450 square feet of coverage, and with the 12,000 BTU model, you get about 350–600 square feet. Both of those assume your ceilings are 8–9 feet and your insulation is about average. If you buy a unit that's too big, it will short cycle and that is bad for humidity control and it uses energy for no good reason.
- Choose indoor unit placement. Mount the air handler high on an interior wall where it is got clear airflow in all directions, typically 7+ feet from the floor. Plan the condensate drain so it runs toward the exterior wall where you'll drill the line-set pass-through.
- Choose outdoor condenser location. Place the condenser on a stable, level pad (concrete or composite) or use wall-mount brackets. Maintain at least 12–24 inches from walls and obstructions, and elevate the unit above expected snow lines in colder climates. Confirm it's within your ordered line-set length (16 feet standard, up to 75 feet custom).
- Verify electrical. For the outdoor receptacle, you need one that is dedicated to this unit, with 15A and 120V. If you do not have one, have a licensed electrician install it. On a 15A circuit, the NEC says the wire gauge has to be at least 14 AWG copper, but the cord kit from Zone Air uses 12 AWG to give you extra room.
Adapting Existing Wiring
If your home has an old 230V window AC or baseboard heater circuit near the installation area, a licensed electrician can sometimes adapt it for a 115V mini split. The process typically involves re-identifying one of the 230V hot conductors as the neutral and replacing the double-pole breaker with a single-pole 15A breaker. The old outlet box can serve as a junction box for the new dedicated 120V receptacle. This is not a DIY wiring task. It requires an electrician who can verify wire condition, confirm gauge compatibility and ensure code compliance.
Physical Installation Steps
Once you are finished with your electrical prep, follow these steps in order:
- Mount the indoor air handler bracket. Use the included template to mark and secure the mounting plate to wall studs or appropriate anchors. The indoor unit has to be mounted level or you'll get drainage issues, so use a bubble level and double-check before you tighten all the fasteners.
- Drill the line-set pass-through. Use a hole saw to make a 3 inch hole through the exterior wall, and point it slightly downward toward the outside. Then you will put in the wall sleeve and the weather seal. This downward slope matters because condensate drain lines have to slope downward so water does not back up into the indoor unit or the wall cavity.
- Hang the indoor unit and route lines. Lift the air handler up onto the bracket, then feed the refrigerant lines through the wall sleeve, along with the communication wire and the condensate drain. To keep things running right, you'll want to insulate any exposed refrigerant tubing. You need to make sure the drain hose slopes down the whole way to a safe termination point so it doesn't pool against the foundation.
- Set up the outdoor condenser. Position it on the level pad or brackets, keeping the space around it that the manufacturer calls for. The unit should be tied down or secured to prevent vibration and movement.
- Connect the precharged quick-connect refrigerant lines. How do you tighten the fittings correctly? Align the indoor and outdoor fittings, then tighten with a torque wrench following Zone Air's torque instructions exactly. With the quick-connect design, there is no brazing, no flaring and no vacuum pull. Per the manual's leak-check procedure, you'll need to check the connections.
- Route and secure the condensate drain line. Confirm a continuous downward slope from the indoor unit to the drainage termination. Secure the drain with clips or ties so it can't shift or kink over time.
Plug-In Power Connection
- Check that the outlet for the mini split is in good shape, with no corrosion, cracked housing or loose contacts. For the receptacle, it has to be GFCI-protected and fitted with a weatherproof in-use cover.
- Connect the Zone Air 115V power cord kit to the outdoor condenser's terminal block the way the manual shows, then plug the NEMA 5-15P end into the dedicated 120V outlet.
- Secure the cord with strain relief and route it off the ground where you can. Don't try to use an extension cord with a mini split. Sized and rated for the compressor's start-up and running loads, the cord kit is built for the job.
- Confirm GFCI and/or AFCI protection where your local electrical code says it's required. If the breaker trips repeatedly on start-up, the circuit may have too much voltage drop from a long wire run or it may need a thicker gauge. Consult an electrician.
Start-Up and Testing
- At the breaker panel, you can restore power and set the system to cooling mode first. Let it run for 10–15 minutes.
- Listen for unusual noises from the compressor or the fan motors, check to see if frost is forming on the lines, and watch for error codes to show up on the display on the indoor unit.
- Check that condensate drains the way it should during cooling mode. Water should flow in a steady stream from the drain line with no backup or dripping inside the room.
- You can switch to heating mode and confirm the heating start-up sequence. When the weather is cold, watch what happens while the unit goes through the defrost cycle.
- Test the remote control, the Wi-Fi app connection and the auxiliary modes, including Sleep, ECO and Turbo.
Warranty and Registration
Under Zone Air's warranty, parts are covered for 5 years and the compressor for 7 years, and installing the system yourself does not void it. There's no registration deadline. Registering is only recommended so your proof of purchase is on file. You'll want to keep your receipt and installation photos in case you ever need to file a claim.
Cost Comparison
With a 120V plug-in DIY mini split, the math on what it costs you is simple:
| Cost Category | Zone Air 115V DIY (Plug-In) | Professional 230V Install |
|---|---|---|
| Equipment | $1,899.99–$1,999.99 | $1,500–$2,500 |
| Cord kit / accessories | ~$50 | Included |
| Electrician (outlet or circuit) | $150–$500 | $500–$1,500+ (230V run, panel work) |
| HVAC labor | $0 (DIY) | $1,000–$2,500 |
| Estimated total | $2,100–$2,550 | $3,000–$6,500+ |
On those estimates, the 120V plug-in approach can cut total installed cost by about a third to well over half compared to a professionally installed 230V system, mainly by eliminating HVAC labor and reducing electrical upgrade expenses. Zone Air has the 9K model at $1,899.99 and the 12K at $1,999.99 (October 2026) with free shipping to the 48 contiguous states.
Before you order, take a few minutes to measure your room, check whether your electrical panel has spare 15A capacity, and check what your local code says about plug-in condenser connections.
Key Takeaways
- For homeowners who want to avoid 230V wiring and professional HVAC labor, Zone Air's 115V mini split models are a 120V plug-in option.
- Both the 9,000 BTU and 12,000 BTU units are rated 23 SEER2 and can heat in cold climates down to −13°F.
- Running anywhere from 5 to 75 feet, the precharged quick-connect line sets are custom-cut to the length you need, so you don't need a vacuum pump, brazing equipment or a refrigerant certification.
- You need a dedicated 15A circuit, a proper outdoor receptacle and compliance with local code - these are required.
- With a DIY 120V plug-in system you install yourself, the total cost can run a third to more than half less than the cost of a similar 230V setup that a pro installs.
If you're heating or cooling a garage, home office, ADU or bonus room and your home already has available 15A circuit capacity, a Zone Air 115V DIY mini split is one of the most practical options on the market. Start by measuring your space, checking your panel and reviewing Zone Air's spec sheets to confirm the right model for your project.
Specs and warranty terms are manufacturer-published as of October 2026, subject to change; verify before purchase. MRCOOL® is a trademark of its owner.