DIY Multi Zone Mini Split Installation: MRCOOL, Pioneer, Klimaire & Zone Air (Official Guide)
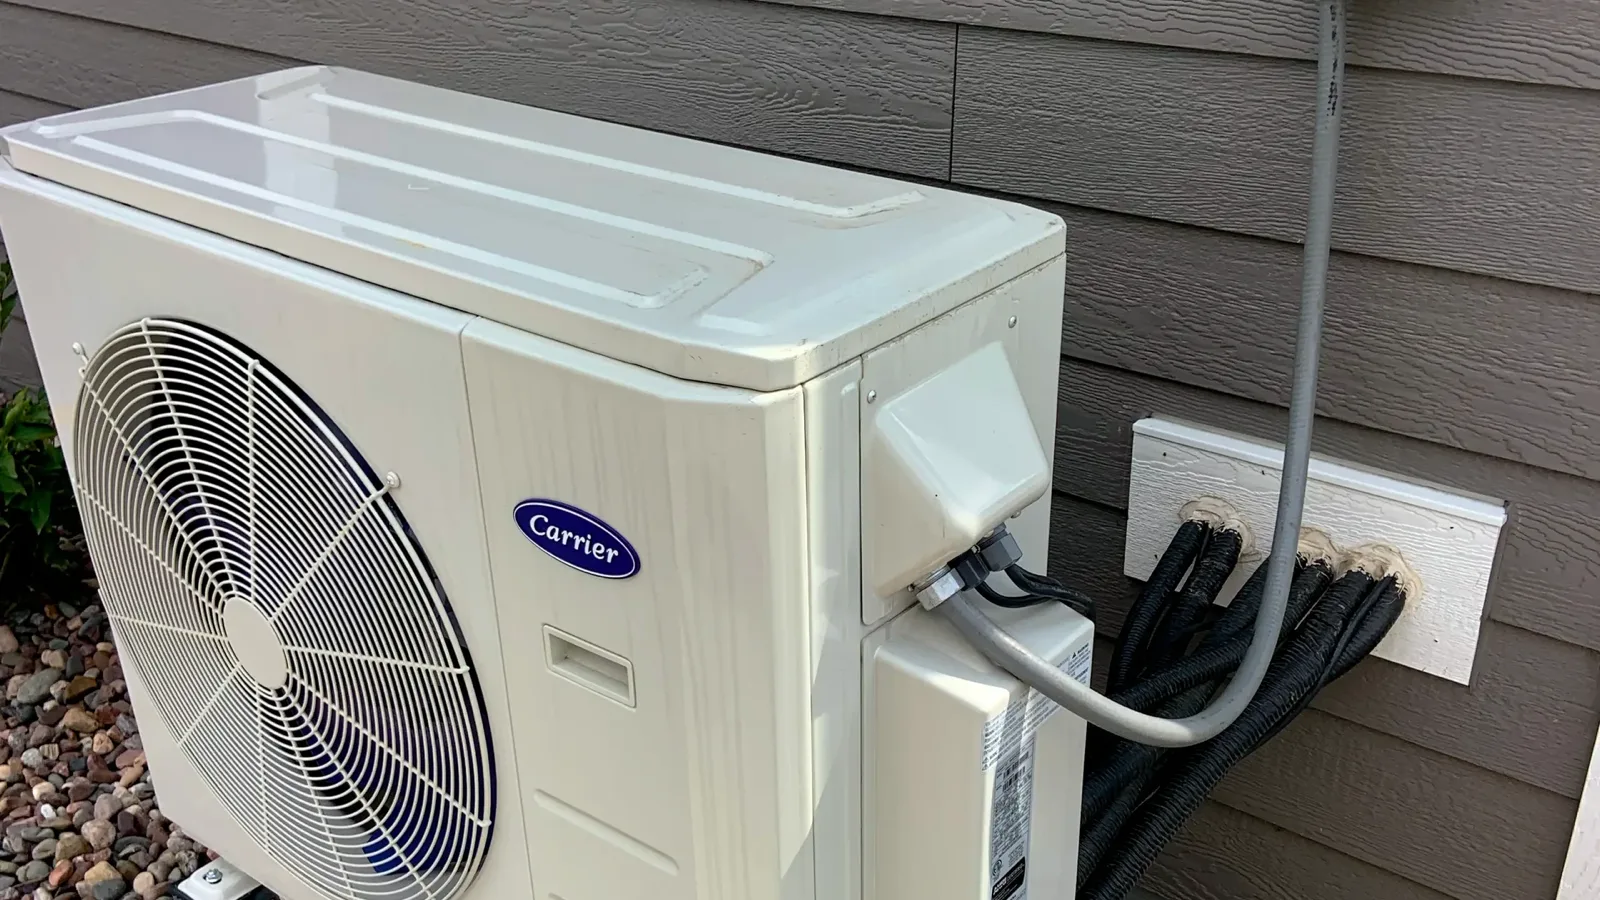
Diy multi zone mini split installation can save serious money - but only if you pick the right brand and follow the right process. This guide tells you what you need to know about diy multi zone mini split installation across four major brands, from how to plan it and what tools you need to step-by-step guides and what can go wrong with the warranty.
Can You Install a Multi‑Zone DIY Mini Split?
Yes - but it can completely depend on the brand you choose. True diy mini split systems from Zone Air ship with pre charged line sets and quick connect fittings, meaning you never touch refrigerant, never need a vacuum pump, and never need an EPA Section 608 certification, because the refrigerant circuit is never opened. These systems are designed for homeowner installation without special tools. Pioneer and Klimaire multi zone systems, by contrast, ship with standard copper linesets with flare fittings that need cutting, flaring, vacuuming and a refrigerant charge check.
A pretty handy homeowner can usually install a 2–4 zone system over a single weekend. That means putting in the outdoor condenser and the wall mount air handler units. A single-zone diy mini split is usually something you can get done in an afternoon. That said, electrical work should always be handled by a licensed electrician per current NEC codes. DIY mini splits can save you the labor portion of a professional install, which often runs into the thousands of dollars, and diy systems let you skip the HVAC certifications during installation because the pre charged linesets get rid of the vacuum pump step.
The main difference between true diy mini split systems and diy adjacent systems is simple: pre charged line sets with quick connect fittings (no refrigerant handling) versus standard copper line sets that need a vacuum, flaring tools and often a licensed hvac technician. In our view, pre charged DIY systems are the best way to save money without risking warranty issues or refrigerant leaks.
When DIY makes sense:
- Conditioning a garage, a bonus room or a home office
- Whole-house retrofit with multi zone options
- You will be replacing window units or electric baseboard heat
- Adding climate control to an ADU or a finished basement
When to hire a pro:
- Complex electrical panels or structural modifications
- Non-DIY systems requiring refrigerant work (Pioneer, Klimaire)
- Cold climate installs are where you might want a tech to commission the system.
How Multi Zone DIY Mini Split Systems Work
A mini split system is a ductless heat pump with an outdoor condenser connected by a refrigerant line set to one or more indoor air handler units, and it delivers room-by-room heating and cooling without any ductwork. A multi-zone system has an outdoor condenser and multiple indoor units that are matched to it, and each indoor unit runs independently with its own remote or app-based control.
A typical 2026 multi zone setup has an outdoor unit with 18,000–55,000 BTU that sends refrigerant to 2–6 indoor heads. You can get these indoor heads in wall mount, ceiling cassette or concealed duct styles. For example, a 36k BTU 4-zone system might pair 9k BTU air handlers in bedrooms with an 18k BTU unit in the living room, and it would all run on R-454B refrigerant. DIY multi zone systems cover anywhere from a couple of rooms up to a whole small home, depending on zone count and how you set it up. The refrigerant lines from indoor handlers have to connect to designated ports on the outdoor unit, and installing a multi-zone mini-split system lets you heat and cool different rooms independently.
Cold-climate heat pumps are able to keep heating at low outdoor temperatures. Zone Air's multi zone systems are rated to heat down to −13°F, while Pioneer's Quantum Hyperformance line is rated to −22°F. That makes mini splits viable as a primary heating and cooling system even in colder climates.
| Aspect | Single-Zone | Multi-Zone |
|---|---|---|
| Rooms controlled | 1 | 2–6 |
| Upfront equipment cost | $500–$3,000 | $2,000–$10,000 |
| Install complexity | Simpler piping, one line set | Multiple line sets, load balancing |
| Typical use | Single room, garage, addition | Whole-house retrofit, multi-room comfort |
Choosing the Right DIY Multi Zone Mini Split
Your brand choice determines whether your install path is truly DIY or needs at least some professional help. Here's what sets the options on the market in 2026 apart:
- Zone Air (best overall for true DIY): Zone Air's wall mount multi zone systems are rated 24 SEER2 on 230V and heat down to −13°F. They ship with pre charged quick connect line sets, and as of October 2026 Zone Air is the only DIY mini split that lets you mix wall mount, ceiling cassette and concealed ducted units on one outdoor unit. Of the four brands here, it's also the only one that cuts the pre charged line set to the exact length you measure, any whole foot from 5 to 75 ft, so there's no excess coil to hide. The systems get final assembly, testing and inspection in the USA from globally-sourced components. The honest downsides are that one Zone Air multi zone condenser runs two or three heads, not four to six and the cassette and ducted heads carry lower ratings at 21 and 19 SEER2 than the wall units.
- MRCOOL DIY 5th Gen: It's a known name and the most widely stocked option. MRCOOL's DIY systems are available in big-box stores like Home Depot and Lowe's.
- Pioneer: Pioneer's Quantum Hyperformance series reaches up to 25 SEER2 and −22°F, and the brand is sometimes sold as DIY-friendly. But its standard copper line sets must be cut, flared and pumped down, which makes these diy adjacent rather than plug-and-play. Pioneer's warranty is 1 year if you don't register and up to 5 years if you register within one week of a proper install. It doesn't name a licensed installer, but a faulty installation isn't covered.
- Klimaire: It has high efficiency specs, but the kits use flare-fitting copper line sets that need evacuation, and its warranty center sets out installer and registration conditions you should read before buying. It's a reasonable pick for homeowners who don't mind hiring a pro for the refrigerant step but want to keep the cost low compared to a full pro install.
- Senville: Senville's Arctic Series is rated up to 25.5 SEER2 and heats to −22°F. However, Senville's warranty page says DIY installation will void your warranty coverage and that a licensed HVAC professional must pressure test and evacuate the line sets, which is similar in practice to Pioneer.
Quick comparison factors:
- Line set type: pre charged linesets (Zone Air) vs flare-type (Pioneer, Klimaire, Senville)
- Cold-climate heating rating for colder climates
- Warranty: 5/7-year coverage varies by brand and registration
- US-based tech support and install guides
Planning a Multi Zone DIY Installation
Proper planning prevents most multi zone mini split mistakes. Accurate planning includes figuring the cooling and heating load for each zone using a modern online sizing calculator plus manual checks - square footage, insulation levels, ceiling height and window direction.
- Mapping zones: A 4-zone home might include a primary suite at 12–18k BTU, two kids' rooms at 9k each, and an open living area at 18–24k BTU. This makes temperature control simpler versus running four separate single-zone units.
- Outdoor condenser placement: Keep the space requirements in your manual, and as a rule of thumb allow 12–24 inches on the sides and a few feet of open air above. Use a concrete pad or wall mount bracket, and keep some distance from bedroom windows for sound comfort.
- Indoor unit locations: Mount indoor units on sturdy walls while keeping clear airflow paths. Place them on exterior walls to shorten line set runs, and keep at least 6 inches clearance above each unit.
- Electrical planning: Multi-zone condensers run on dedicated 208/230V circuits. Zone Air's dual zone systems call for a 30A double-pole breaker. Smaller single-zone diy systems may use 115V dedicated circuits. Many municipalities require mechanical and electrical permits for multi-zone installations. Verify that residential DIY systems comply with local building codes regarding installation.
- Line limits: Multi-zone systems have maximum line-length limits and elevation limits, so check your model's spec sheet before you run any lines. Zone Air cuts custom sets from 5 to 75 ft.
Tools, Parts & Safety Gear
True DIY systems like Zone Air are able to minimize the tools you need dramatically. Pioneer and Klimaire traditional installs add a vacuum pump, manifold gauges and flare kits to the list.
Basic tools for any mini split install are:
- Drill with 2.75–3.5 inch hole saw
- Level, stud finder, tape measure
- Screwdrivers and nut drivers
- Masonry drill bits for block or brick walls
Safety gear:
- NIOSH-approved safety glasses
- Cut-resistant gloves and hearing protection
- Appropriate ladder for 8–10 ft mounting heights
Extra tools for non-DIY hvac systems are (Pioneer/Klimaire):
- Two-stage vacuum pump capable of reaching 500 microns
- Micron gauge and torque wrenches for flare fittings
- You will need a nitrogen tank for pressure testing line sets
Included in the box: Zone Air sends the communication cable with every unit and the drain hose and tape with every wall mount system. Its multi zone packages price the pre charged line sets separately, one per zone, so you pick each length. All high-voltage electrical connections should still be handled by a licensed electrician to protect warranties and stay code-compliant.
Installing a Multi Zone DIY Mini Split Step by Step
This section covers true DIY multi zone installs using pre charged quick connect systems like Zone Air bundles. The installation of multi-zone systems can be DIY-friendly with these pre-charged versions. Read the manual and watch the brand's install guide before starting for the best results.
Chronological steps:
- Unboxing & inspection: Verify model numbers, check condenser fins for shipping damage, and confirm quick connect caps are sealed.
- Mount indoor air handlers: Use the supplied template to locate studs, and use rated wall fasteners if needed. Keep 6+ inches clearance above each unit and check for level so you don't get condensate pooling.
- Drill wall penetrations: Drill wall penetrations for line sets, control wires and drain hoses at a downward angle - about ¼-inch drop per foot. Drain hoses must maintain a continuous downward slope for proper drainage. Use the included wall sleeve to protect insulation.
- Route line sets: Group and label each run (Zone 1, Zone 2, etc.). Plan gentle turns - never kink copper. Proper sealing around line sets prevents air leaks and insect intrusion. Use line set covers where runs are exposed.
- Mount outdoor condenser: Level the pad, secure the unit and leave service clearance on all sides.
- Connect quick connect fittings: Clean the caps, hand-tighten, then torque to spec per the manual. Never open valves until every connection is secure.
- Electrical connections: Connect the outdoor unit to its dedicated circuit, wire indoor and outdoor units per the manual, and install a disconnect switch.
- Startup: Power on, run test cycles in cooling mode, check condensate drainage, listen for strange sounds, verify the outdoor unit fan operates correctly, and adjust each zone's temperature using the remote or app.
Pioneer, Klimaire & Zone Air Compared
While the overall install process is similar, every brand has little differences that affect the installer experience and long-term reliable performance.
- Pioneer: Diamante vs Quantum Hyperformance models differ in cold climate ratings. Flare-type line connections need precise torque specs - loose fittings cause slow refrigerant leaks. The warranty registration window is short: within one week after a proper install.
- Klimaire: It has strong specs, but standard line set installs need a vacuum pump. There are warranty conditions on the installer and registration. It's not a bad system, just not truly DIY.
- Zone Air: It's the most flexible for 2026. Zone Air lets you mix indoor unit types on one condenser, wall, cassette or ducted. It cuts each line set to your measured length. Its 115V single-zone units offer an optional plug-in cord kit, though multi zone systems are 230V and hardwired. The remote carries a 7-day schedule, and the app adds location-based auto control and Alexa or Google Home voice control. Its 5-year parts, 7-year compressor warranty isn't voided by DIY installation and isn't tied to signing up within a set number of days.
Scenario: A 3-zone upgrade covering a living room and two bedrooms. With Zone Air, you connect three pre charged linesets cut to length, mount your indoor and outdoor units, and you're done. With Pioneer, you'd mount everything yourself, then schedule and pay a technician for just the refrigerant step. That's the main difference you feel on install day.
Performance, Cold-Climate Heating & Everyday Climate Control
Modern mini splits in 2026 deliver energy efficiency ratings measured in SEER2 and HSPF2. DIY mini splits can hit efficiency ratings up to 24 SEER2, and high-efficiency units can cut a real chunk off heating and cooling bills compared to older central AC or electric baseboard heat.
Cold-climate models use inverter-driven compressors that keep heating at low outdoor temperatures, −13°F for Zone Air multi zone systems and −22°F for Pioneer Quantum Hyperformance units. This makes mini splits a legitimate primary heating system even in cold places.
- Room-by-room climate control: You can set a renovated attic office to 72°F while the rest of the house stays at 68°F in winter, which is a perfect use case for a diy mini split system.
- Smart features: Wi-Fi apps, voice control via Alexa and Google Assistant, location-based auto control and a 7-day schedule help you adjust comfort automatically.
- Noise: Modern indoor air handlers operate at about 18–44 dB depending on model and fan speed. Proper line set routing and anti-vibration pads under the outdoor condenser make a noticeable difference in sound comfort.
Pioneer & Klimaire Traditional Install Path
This section is for readers considering Pioneer, Klimaire or similar systems that aren't sealed DIY systems and use conventional copper line sets with flare fittings. EPA Section 608 certification is mandatory for handling refrigerants in standard split systems.
- Steps you can handle yourself: Mounting indoor air handlers and the outdoor unit, running line sets through walls, and running condensate drains.
- Pro-required steps: A licensed HVAC technician cuts and flares the line set, pressure-tests with nitrogen, evacuates to 500 microns or lower using a vacuum pump, and releases refrigerant.
- Why vacuuming matters: Removing moisture prevents acid buildup and compressor damage, improves system efficiency and meets the manufacturer's installation requirements.
- Hybrid DIY: Some homeowners in 2026 mount and run everything themselves, then pay a technician 2–3 hours for just the refrigerant step. This saves on labor while keeping warranty in place.
- Warning: Skipping the vacuum step or DIY-charging Pioneer/Klimaire systems can void multi-year warranties and can wipe out all savings if a compressor fails.
If you want a full DIY install with no refrigerant handling, choose a pre charged brand like Zone Air instead of trying to get around manufacturer instructions.
Costs, Lifespan & When DIY Makes Sense
DIY mini splits cost between $1,500 and $5,000 for equipment. Multi-zone systems range from $2,000 to $10,000 depending on capacity and zone count. A 2–3 zone system at 24k–30k BTU usually runs $2,000–$4,000 before line sets. Zone Air's 24K dual zone wall system is $3,039.99 and its 27K three zone is $3,509.99 as of October 2026, while 4–6 zone setups at 36k–55k BTU land between $3,500–$7,000 before add-ons. DIY saves the contractor's labor, which is often the biggest line on a pro quote.
- Extra costs: Electrical work ($500–$2,000), condensate pumps ($120–$250 each), line set covers ($100–$300)
- Lifespan: 15–20 years when properly installed and maintained
- Warranty: Zone Air offers 5-year parts and 7-year compressor coverage with no registration window, it covers self-installed systems, and Zone Air also takes returns within 30 days on units you haven't installed with a 25% restocking fee. Pioneer is 1 year if you don't register or up to 5 years if you register, and Klimaire's terms are in its warranty center.
- Best use cases: Replacing electric resistance heat, conditioning new additions or trading multiple window units for a single multi zone mini split system
If you're ready for a true DIY experience with strong support, flexible multi zone options and no refrigerant headaches, Zone Air is the best starting point in 2026. Size your zones, pick your indoor unit styles, and order a pre charged multi-zone package. Your weekend project is waiting.
Frequently Asked Questions About DIY Multi Zone Mini Split Installation
Can I install a multi zone mini split myself?
Yes, if the system ships with pre charged quick connect line sets. Zone Air multi zone systems are built for homeowner installation with no vacuum pump and no refrigerant handling. Pioneer and Klimaire kits use flare fittings, so the line set has to be evacuated, which most homeowners hand to a licensed HVAC tech.
Do I need an EPA 608 certification to install a pre charged mini split?
No. Section 608 certification covers handling refrigerant. With a pre charged quick connect system you never open the refrigerant circuit, so there is nothing to handle. You still need it (or a tech who has it) for a flare line set that has to be evacuated and charged.
How many zones can a DIY multi zone condenser run?
Zone Air's multi zone condenser runs two or three indoor units, up to 36,000 BTU of connected capacity, and you can mix wall mount, ceiling cassette and concealed ducted heads on it.
Does DIY installation void the warranty?
Not on Zone Air. It carries 5-year parts and 7-year compressor coverage and doesn't require registration within a set window. Pioneer gives 1 year unregistered or up to 5 years if you register within one week of a proper install. Senville's warranty page says DIY installation voids coverage. Read Klimaire's warranty center before buying.
What size breaker does a multi zone mini split need?
Multi zone condensers run on a dedicated 208/230V circuit. Zone Air's dual zone systems call for a 30A double-pole breaker. Have a licensed electrician run the circuit and the disconnect.
How long does a multi zone DIY install take?
A handy homeowner can usually get a 2 to 4 zone pre charged system done over a weekend: mount the heads, drill the wall penetrations, route the line sets, set the condenser, connect the fittings, then have the electrical finished and start it up.
Planning hidden ducted heads on more than one room? Follow the multi zone concealed mini split DIY installation guide for the full multi-zone sequence.
Specs, prices and warranty terms are manufacturer-published as of October 2026, subject to change; verify before purchase. MRCOOL, Pioneer, Klimaire and Senville are trademarks of their respective owners. Zone Air and DIY HVAC Tools are not affiliated with or endorsed by any of them.